※ 파일 업로드 코드 작성
** write.php
게시글을 작성하는 페이지에 코드를 추가로 작성한다
<form method="post" action="write_ok.php" enctype="multipart/form-data" autocomplete="off">form 태그에 enctype = "multipart/form-data"를 추가하여 기존 post 방식에서 데이터를 전송하는 용량보다 더 큰 용량을 전송할 수 있도록 한다.
<td>첨부파일</td>
<td><input type="file" name="file"></td>
게시글 작성 테이블 내 하단에 파일을 첨부할 수 있도록 input type을 file로 설정하고 name 속성도 이름을 설정한다
** write_ok.php
    //변수 정리
    $error = $_FILES['file']['error'];
    $tmpfile = $_FILES['file']['tmp_name'];
    $filename = $_FILES['file']['name'];
    $folder = "./file/uploads/".$filename;

    if( $error != UPLOAD_ERR_OK ){ //오류 확인
    switch( $error ) {
            case UPLOAD_ERR_INI_SIZE:
            case UPLOAD_ERR_FORM_SIZE:
                echo "<script>alert('파일이 너무 큽니다.');";
                    echo "window.history.back()</script>";
                    exit;
        }
    }
    move_uploaded_file($tmpfile, $folder);

    $sql = "INSERT INTO board(name, title, content, udate, file, hit, liked)
	VALUES ('$uname', '$title', '$content', now(), '$filename', 0, 0);";
$_FILES는 HTTP 파일 업로드 변수로, POST 메서드를 통해 현재 script에 업로드 된 항목의 배열이다
전역 PHP $_FILES 배열을 사용하여, 서버에 파일을 업로드 한다
첫 번째 파라미터는 form의 input name(위의 경우 'fiile') 이고, 두 번째 인덱스는 name, type, size, tmp_name, error 중 하나가 올 수 있다.
$error = $_FILES['file']['error'];$_FILES['사용자의 파일 이름'],['error']로 오류 값을 찾을 수 있다
$tmpfile = $_FILES['file']['tmp_name'];$_FILES['사용자 파일 이름']['tmp_name'];
서버가 업로드 받을 파일을 /tmp 디렉토리에 임시 저장한다
▶ 파일 업로드 경로
$folder = "./file/uploads/".$filename;현재 위치는 /var/www/html이므로 해당 경로에 uploads 파일을 만들었다
$ sudo mkdir file
$ cd file
$ sudo mkdir uploads

boeun@boeun-VirtualBox:/var/www/html/file/uploads
게시글 작성 페이지에서 파일 업로드를 실행했는데 file/uploads 폴더에 파일이 업로드 되지 않았다.
이럴 경우에 업로드 되는 폴더의 권한을 변경한다
boeun@boeun-VirtualBox:/var/www/html/file$ sudo chmod 777 uploads
boeun@boeun-VirtualBox:/var/www/html/file$ sudo service apache2 restart
chmod 777 uploads로 폴더 권한 변경 후 apache 재시작
  if( $error != UPLOAD_ERR_OK ){ //오류 확인
    switch( $error ) {
            case UPLOAD_ERR_INI_SIZE:
            case UPLOAD_ERR_FORM_SIZE:
                echo "<script>alert('파일이 너무 큽니다.');";
                    echo "window.history.back()</script>";
                    exit;
        }
    }
> UPLOAD_ERR_OK → Error Code : 0;
오류가 없으며 파일이 성공적으로 업로드 되었다.
> UPLOAD_ERR_INI_SIZE → Error Code : 1;
업로드 된 파일이 php.ini의 upload_max_filesize 지시문을 초과한다.
> UPLOAD_ERR_FROM_SIZE → Error Code : 2;
업로드 된 파일이 HTML 양식에 지정된 max_file_size 지시문을 초과하였다.
move_uploaded_file($tmpfile, $folder);에러 없이 파일이 정상적으로 업로드가 되면 $tmpfile 디렉토리에 저장되어있는 파일을 $folder에서 설정한 경로로 옮긴다
$sql = "INSERT INTO board(name, title, content, udate, file, hit, liked)
VALUES ('$uname', '$title', '$content', now(), '$filename', 0, 0);";
쿼리문 → file 컬럼에 $filename 값을 전달한다
※ 게시글 작성 페이지의 파일 업로드 구현
게시글 작성 페이지에서 파일을 첨부해보자

jpg 파일을 업로드


파일이 /file/uploads에 업로드 되었다
※ 파일 다운로드 코드 작성
게시글 조회 페이지(read.php)에 첨부파일을 다운로드 받을 수 있도록 a href 태그를 이용한다
** read.php
<?php
    $connect = mysqli_connect('localhost', 'root', 'mysql', 'board');
    $idx = $_GET['idx'];  // GET 방식 사용
    session_start();
    $hit="update board set hit=hit+1 where idx=$idx";
    $connect->query($hit);

    //쿼리문에 file 컬럼명을 추가한다
    $query = "select name, title, content, udate, file, hit, liked from board where idx = $idx";
    $result = $connect->query($query);
    $rows = mysqli_fetch_assoc($result);
?>

<table class="read_table" align=center style="border-radius: 10px">
        <tr>
            <td colspan="4" class="read_title"><?php echo $rows['title'] ?></td>
        </tr>
        <tr>
            <td class="read_id">작성자</td>
            <td class="read_id2"><?php echo $rows['name'] ?></td>
            <td class="read_hit">조회수</td>
            <td class="read_hit2"><?php echo $rows['hit'] ?></td>
        </tr>
        <tr>
            <td colspan="4" class="read_content" valign="top">
                <?php echo $rows['content'] ?></td>
        </tr>
        <!--추가한 코드 -->
        <tr>
            <td class="read_file">첨부파일 : <a href='./download.php?file=<?=$rows['file'];?> &target_Dir=./file/uploads'>다운로드</a></td>
        </tr>
    </table>
php 코드의 쿼리문에 file 컬럼 명을 추가한다.
a href 태그를 사용해서 GET방식으로 파일명과 파일 경로를 download.php 페이지로 전송한다.
** download.php
<?php
  $filename = $_GET["file"];
  $target_Dir = $_GET["target_Dir"];
  $file = $target_Dir."/".$filename;

  $filesize = filesize($file);

  if (is_file($file)) {

        header("Content-type: application/octet-stream");
        header("Content-Length: ".filesize("$file"));
        // 다운로드 되는 파일명, 실제 파일명과 별개로 지정 가능하다
        header("Content-Disposition: attachment; filename=$filename");
        header("Content-Transfer-Encoding: binary");
        header("Cache-Control: must-revalidate, post-check=0, pre-check=0");
        header("Pragma: public");
        header("Expires: 0");

        $fp = fopen($file, "rb");
        fpassthru($fp);
        fclose($fp);
  }
  else {
      echo "해당 파일이 없습니다.";
  }
?>
※ 파일 다운로드 구현
① read.php 페이지에서 다운로드 클릭

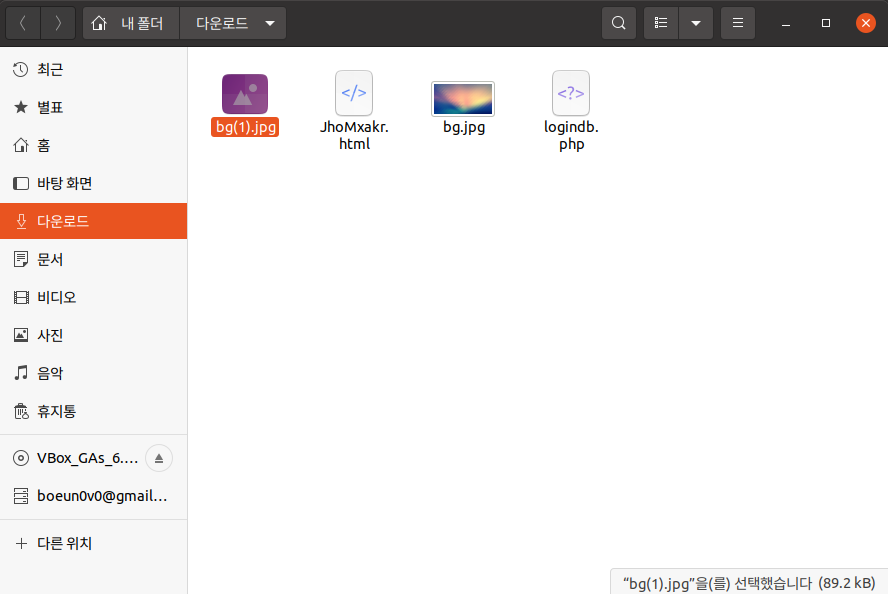
② 파일이 다운로드된다

③ 다운로드 폴더에서 파일을 볼 수 있다.
** 참고 링크
http://jun.hansung.ac.kr/SWP/PHP/PHP%20File%20Upload.html
PHP File Upload
PHP File Upload PHP 를 사용해서 파일을 서버에 업로드하는 것이 가능하다. Create an Upload-File Form 사용자들이 폼으로 파일을 업로드 할수 있도록 하는 것은 매우 유용할 수 있습니다. 파일을 업로드
jun.hansung.ac.kr
[PHP] 첨부파일 다운로드 소스
최대한 간결하게 포스팅합니다 html 에서 다운로드 할 파일명과 디렉토리를 같이 download.php 로 보내서 download.php 단에서 GET 파라미터 받아와서 합쳐갖고 다운 진행하는 부분입니다. html 다운 downloa
bug41.tistory.com
'Web Hacking Study > Web Page 만들기' 카테고리의 다른 글
| 마이페이지 (개인정보 확인, 개인정보 수정, 비밀번호 변경 기능) (0) | 2022.06.19 |
|---|---|
| 게시판 페이지 개발 (좋아요/좋아요 취소) (0) | 2022.06.15 |
| 게시판 페이지 개발 (게시글 검색 기능, 게시글 검색 시 기간 설정) (0) | 2022.06.06 |
| 게시판 페이지 개발 (게시글 페이징) (0) | 2022.06.05 |
| 게시판 페이지 개발 (게시글 삭제 기능) (0) | 2022.05.30 |

댓글